CEE TEL Design Content Management Padlet in LearnJCU
Padlet in LearnJCU
- Future Students
- JCU Global Experience
- International Students
- Open Day
- How to apply
- Pathways to university
- Virtual Open Day
- Living on Campus
- Courses
- Publications
- Scholarships
- Parents and Partners
- JCU Heroes Programs
- Aboriginal and Torres Strait Islander in Marine Science
- Elite Athletes
- Defence
- Current Students
- New students
- JCU Orientation
- LearnJCU
- Placements
-
CEE
- Search
- About CEE
- Education Strategy
- Teaching@JCU Support
- Assessment@JCU
-
TEL Design
- About LearnJCU
-
Assessment & Feedback
- Artificial Intelligence
- Assessment Tools
- Assessing Group Work
- Assessment Case Studies
- Assessment Methods
- Enable or Disable Submission View
- Inline Marking
- Grade Centre Setup
- Group Assessment Tools
- Marking and Feedback
- Multiple Choice Questions
- One Question at a Time
- Peer Review
- Release Conditions
- Respondus Secure Online Exams
- Respondus FAQs
- Safe Assign
- Save Grade Centre Filtering
- Submission Receipts
- Test Response Download
- Test Settings
- Timezones
- Video Assessment
- Collaboration
- Communication
-
Content & Learning Resources
- Accessibility in LearnJCU
- Banners for Subjects
- Computations
- Content Management
- Create Studio
- DIY Engaging Videos
- Emojis in Ultra Docs
- Exemplars in LearnJCU
- H5P in LearnJCU
- Hypothesis
- Intro Videos
- Learning Sequence (PDF)
- LearnJCU Layouts (PDF)
- Digital Media Support
- LinkedIn Learning
- Mayer's 12 Principles of Multimedia (PDF)
- Media Resources
- Open and Licensed Resources
- Padlet in LearnJCU
- Panopto Video Capture
- PebblePad ePortfolios
- Progress Tracking
- Release Conditions
- Subject Site Setup
- Organisation & Structure
- Participation & Engagement
- The Learn Lowdown
- Teach with Tech Ebook
- Data & Evaluation
- Student Success
-
Development & Recognition
- Professional Development
- PD Webinar Recordings
-
Grants & Awards
- JCU Learning & Teaching Innovation Grants
- JCU Sessional Teaching Awards
- JCU Inclusive Practice Awards
- JCU Inclusive and Accessible LearnJCU Site Awards
- JCU Citations for Sustained Commitment to Enhancing Diversity, Equity and Inclusion
- JCU Citations for Outstanding Contributions to Student Learning
- National Citations for Outstanding Contributions to Student Learning
- JCU DVC Education's Student Experience Award
- Showcasing Excellence
- Communities of Practice
- SoLT @JCU
- Unicare Centre and Unicampus Kids
- Graduation
- Off-Campus Students
- JCU Job Ready
- Safety and Wellbeing
- JCU Prizes
- Professional Experience Placement
- Employability Edge
- Art of Academic Writing
- Art of Academic Editing
- Careers and Employability
- Student Equity and Wellbeing
- Career Ready Plan
- Careers at JCU
- Partners and Community
- JCU-CSIRO Partnership
- Alumni
- About JCU
- Reputation and Experience
- Chancellery
- Governance
- Celebrating 50 Years
- Academy
- Indigenous Engagement
- Education Division
- Graduate Research School
- Research and Teaching
- Research Division
- Research and Innovation Services
- CASE
- College of Business, Law and Governance
- College of Healthcare Sciences
- College of Medicine and Dentistry
- College of Science and Engineering
- CPHMVS
- Anthropological Laboratory for Tropical Audiovisual Research (ALTAR)
- Anton Breinl Research Centre
- Agriculture Technology and Adoption Centre (AgTAC)
- Advanced Analytical Centre
- AMHHEC
- Aquaculture Solutions
- AusAsian Mental Health Research Group
- ARCSTA
- Area 61
- Lions Marine Research Trust
- Australian Tropical Herbarium
- Australian Quantum & Classical Transport Physics Group
- Boating and Diving
- Clinical Psychedelic Research Lab
- Centre for Tropical Biosecurity
- Centre for Tropical Bioinformatics and Molecular Biology
- CITBA
- CMT
- Centre for Disaster Solutions
- CSTFA
- Cyclone Testing Station
- The Centre for Disaster Studies
- Daintree Rainforest Observatory
- Fletcherview
- JCU Eduquarium
- JCU Turtle Health Research
- Language and Culture Research Centre
- MARF
- Orpheus
- TESS
- JCU Ideas Lab
- TARL
- eResearch
- Indigenous Education and Research Centre
- Estate
- Work Health and Safety
- Staff
- Discover Nature at JCU
- Cyber Security Hub
- Association of Australian University Secretaries
- Services and Resources Division
- Environmental Research Complex [ERC]
- Foundation for Australian Literary Studies
- Gender Equity Action and Research
- Give to JCU
- Indigenous Legal Needs Project
- Inherent Requirements
- IsoTropics Geochemistry Lab
- IT Services
- JCU Webinars
- JCU Events
- JCU Motorsports
- JCU Sport
- Library
- Mabo Decision: 30 years on
- Marine Geophysics Laboratory
- Office of the Vice Chancellor and President
- Outstanding Alumni
- Pharmacy Full Scope
- Planning for your future
- Policy
- PAHL
- Queensland Research Centre for Peripheral Vascular Disease
- Rapid Assessment Unit
- RDIM
- Researcher Development Portal
- Roderick Centre for Australian Literature and Creative Writing
- Contextual Science for Tropical Coastal Ecosystems
- State of the Tropics
- Strategic Procurement
- Student profiles
- SWIRLnet
- TREAD
- TropEco for Staff and Students
- TQ Maths Hub
- TUDLab
- VAVS Home
- WHOCC for Vector-borne & NTDs
- Media
- Copyright and Terms of Use
- Australian Institute of Tropical Health & Medicine
- Pay review
What is Padlet?
Padlet is an online bulletin board tool that you and your students can use to post text and other content types, such as images, audio and video.
With Padlet, you can create an online learning activity that is engaging and collaborative, and students can post their ideas asynchronously or synchronously. Padlet is available within LearnJCU and is supported by The Learning Environments Team.
Layouts for Padlets
There are many types of layouts to choose from:
- Wall - posts in brick-like format
- Stream - posts one after another (create date ascending or descending)
- Grid - posts in rows
- Shelf - posts in columns
- Map - posts pinned to map
- Canvas - most flexible, posts can be dropped anywhere
- Timeline - posts pinned to horizontal line
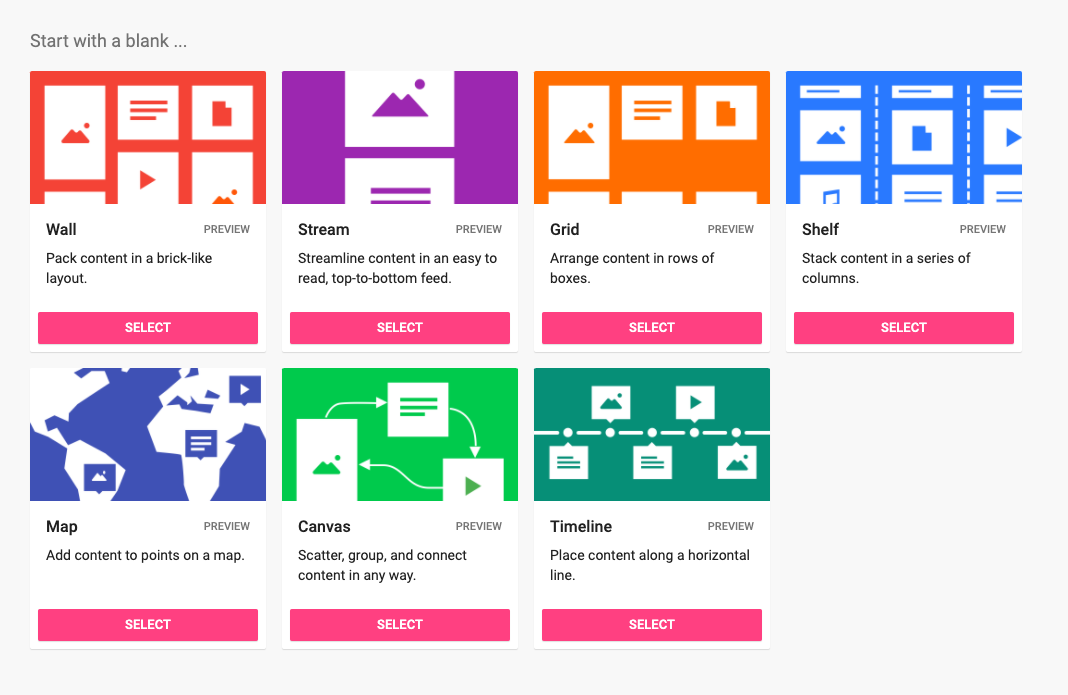
Image above, screenshot of Padlet layout types
Online activities and applications
Comments can be turned on or off providing ways to share Learner-Learner, Learner-Teacher, or Learner-Content interactions. Imagine the possibilities, here are just a few ideas:
- Introductions and ice breakers
- Brainstorming and mind mapping
- Assessment help
- Learning journals
- Interactive debate
- Study group discussion
- Questions and answers
- Topic-related collaborative learning
- Discussion forum alternatives
- Informal peer feedback activities
- Walkthrough presentation
- Task manager
Go to our ServiceNow Knowledge Base Article --> Create your JCU Padlet account
Go to our ServiceNow Knowledge Base Article --> Create a Padlet
Go to our ServiceNow Knowledge Base Article --> Publishing a Padlet
Inserting (sharing) a Padlet into LearnJCU
Each Padlet has its own unique web address (URL). You can make this Padlet link available to students so they can post to it. There are two ways to share a Padlet to your subject site.